 Loading Image...

You can annotate any web page
 opening sticky)
You can place as much your own formatted bookmarks as you wish
 title. (P which will be automatically deleted when inserting the bookmark)
You can
insert two specially formatted editable question answer divisions as
a further contributing tool,
 Q1 this is a question title...You can write a question placed into anywhere it regards to the just read text
 A1 This
is an answer title...You can write answer remark to a section of read
text and can also for example back link to a previously placed
question. * See: Q1
A1 This
is an answer title...You can write answer remark to a section of read
text and can also for example back link to a previously placed
question. * See: Q1or you can use that for FAQ section writing capabilities
Q2  Deleting...Can I delete what I inserted into the text?A2
  Deleting...Naturally!
 Simply click on the picture of the inserted element or in the case of
the sticky or bullet on its number, and the item will be deleted asking you.
Simply click on the picture of the inserted element or in the case of
the sticky or bullet on its number, and the item will be deleted asking you.
In the case of the note refs, every note ref may be deleted one-by-one,
but the Notes separator picture must be deleted also individually clicking on it!
 The
Navigation elements could not be deleted one-by-one. Only the whole
navigation block would be deleted clicking on the navigation line end.
The
Navigation elements could not be deleted one-by-one. Only the whole
navigation block would be deleted clicking on the navigation line end.
 Be careful with any deletion!
You can insert note references into the document
 [1] of the text
or [2] and inserting your custom title[3] (P which will be automatically deleted when inserting the note ref)
[1] of the text
or [2] and inserting your custom title[3] (P which will be automatically deleted when inserting the note ref)
It offers few relevant document editing, styling and further processing possibilities
You can on-line WYSWYG edit a document in the browser
You can automatically generate a Page Content from inserted heading
elements, additionally you can outlining the document, if you choose it.
You can place only or place and write into the document site global navigation, and back/next navigation elements which will be mapped to suitable LINK tags.
This capability is fully corresponding to and usable together with the Site navigation bar 1.1.3 extension: https://addons.mozilla.org/hu/firefox/addon/1949
You can save the document locally and further use it: * see the saving details on the home page - Saving and Reloading a page.

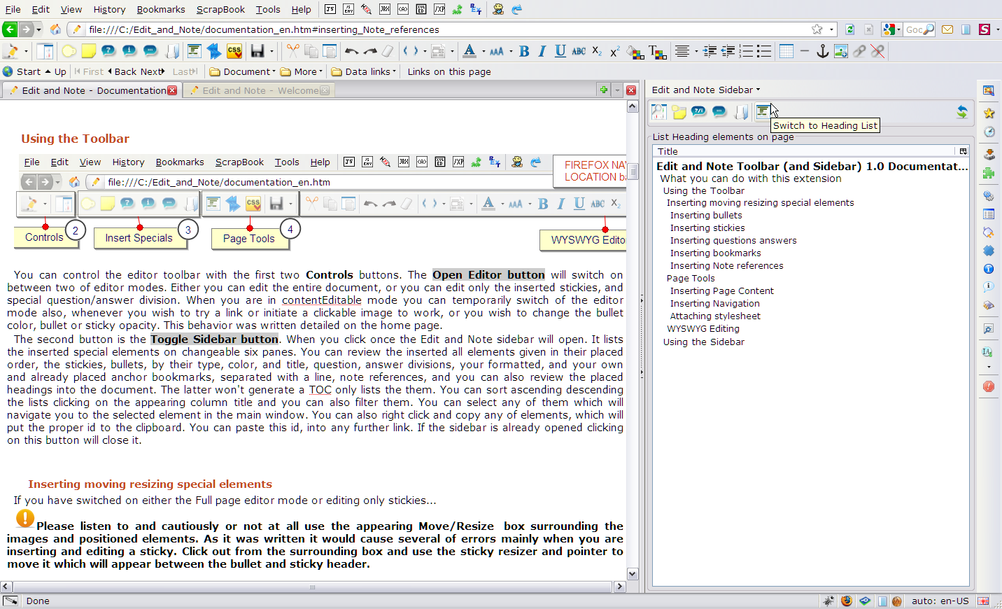
You can control the editor toolbar with the first two Controls buttons. The Open Editor button will switch on between two of editor modes. Either you can edit the entire document, or you can edit only the inserted stickies, and special question/answer division. When you are in contentEditable mode you can temporarily switch of the editor mode also, whenever you wish to try a link or initiate a clickable image to work, or you wish to change the bullet color, bullet or sticky opacity. This behavior was written detailed on the home page.
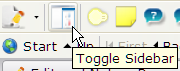
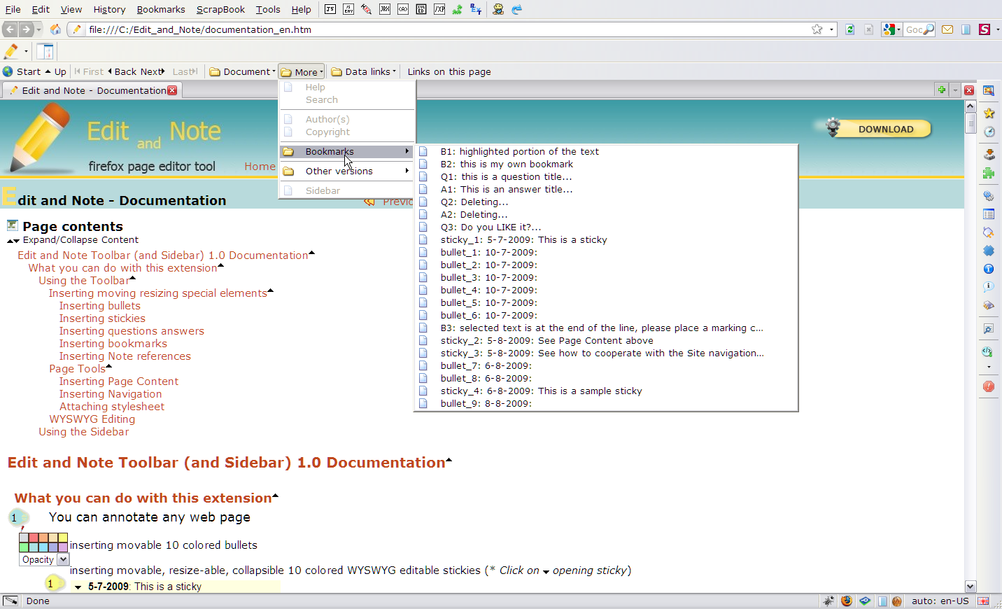
The second button is the Toggle Sidebar button. When you click once the Edit and Note sidebar will open. It lists the inserted special elements on changeable six panes. You
can review the inserted all elements given in their placed order, the
stickies, bullets, by their type, color, and title, question, answer
divisions, your formatted, and your own and already placed anchor
bookmarks, separated with a line, note references, and you can also
review the placed headings into the document. The latter won't generate
a TOC only lists the them. You can sort ascending descending the lists
clicking on the appearing column title and you can also filter them.
You can select any of them which will navigate you to the selected
element in the main window. You can also right click and copy any of
elements, which will put the proper id to the clipboard. You can paste
this id, into any further link. If the sidebar is already opened
clicking on this button will close it.
If you have switched on either the Full page editor mode or editing only stickies...
Please
listen to and cautiously or not at all use the appearing Move/Resize
box surrounding
the images and positioned elements. As it was written it would cause
several of errors mainly when you are inserting and editing a sticky.
Click out from the surrounding box and use the sticky resizer and
pointer to move it which will appear between the bullet and sticky
header.
Using this section of toolbar you can insert
At first, initiating any special element
inserting place the cursor to that point where to wish to insert any of
them! You will be warned if there is no insertion point selected.
The insert will occur next to that element in both three (1.,2.,3.) type of insertions where the cursor was placed. This means the text won't be broken and either the bullet or sticky or question/answer divisions will appear under the selected text, not in-between. Both the bullets and stickies are movable, but technically they remain on that place where they had been inserted even if you can move them anywhere on the page. The inserted question, answer divisions can not be moved. If you moved the stickies and bullets to its right place, but you insert some else text or for example later a Page Content,the position of bullets and stickies must be adjusted by yourself again. I.e. you need to move them again to their right place.
In the (4., 5.) case inserting formatted bookmarks and Note references the inserting would
occur as belows.
At this
case I strongly suggest always using a text-end marker character placed
at the end of text. For example it would be a well seen P. Draw the mouse selection only just before you reach this P. This last character will be automatically cut off. Both in the above two cases the selection will be the default title
of a formatted bookmark or Note reference. You can change it if you
wish.The bookmark or Note reference icons will be placed immediately after the selection.
Very important to know mainly in the
case of stickies if they overlap each other always the last will be
atop. If
you have a sticky collapsed and moved to a place it would occur that
the collapsed sticky covers up some important element for example a
link will not work. Move it to an other place temporarily, then move it
back. Also you need listen to when placing the cursor before inserting
an another sticky, the cursor must there be at an appropriate place
where probably there is not overreaching of a previously placed sticky
text which you just haven't seen because the sticky is collapsed. You
can control any inserting very precisely if you are using Firebug
extension opening its HTML panel. Naturally, if you are not using
that, simply drag the previous near sticky away before placing the
cursor. At first using it may be a little disturbing, but if any
problem occurs you can delete the sticky and try again. Later you will
be better experienced using it.
Listen to the deletion of the numbered bullets and stickies, question/answers since they won't be renumbered! Always delete the last number and go backward if you need to delete an intermediary one. It
is a weakness, but I couldn't (and probably won't be able to)
technically resolve the renumbering!
It would require the copying
repeatedly the body of all of stickies, q/a-s and their corresponding
LINK
elements, too. At this case much simple to accomplish this work by
hand. I suggest using a multi-clipboard program which is otherwise
useful too. (* See a very good one at http://ditto-cp.sourceforge.net/ ).
Put the text of those sticky bodies, or q/a-s you would like to restore into the multi-clipboard. Delete
the stickies, q/a-s backward and insert them again pasting their text from the
clipboard.
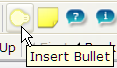
Click on Bullet button on the toolbar. Before clicking it you must place the cursor where to you wish inserting it. Drag
the bullet to the appropriate place with the pointer cursor which will
appear at the middle-right of Bullet. The bullets will be numbered in
their creation order. You can delete them clicking on the bullet
number. Listen to the above mention deletion rule! At the bottom right of bullet you see a little eyedropper.
Clicking on it you will get a color picker table and an opacity
selection box. You can change bullet color and its opacity when the
editor toolbar temporarily disabled.You can also click on eyedropper to hide the color picker and opacity selection.
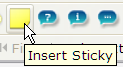
Click on Sticky button on
the toolbar. Before clicking it you must place the cursor where to you
wish inserting it. Drag
the sticky to the appropriate place with the pointer cursor which will
appear at between the sticky bullet and its header. You can either give
a sticky header text or not. The sticky creation date will be inserted
automatically. Also the sticky bullets will be numbered in
their creation order. You can delete them clicking on the bullet
number. Listen to the above mention deletion rule! At the bottom of sticky you see a color picker table and an
opacity
selection box. You can change sticky color when you are in editor mode,
but its opacity only when the
editor toolbar temporarily disabled. You can rich text edit the sticky
body only. If you are in full page editor mode you can able to change
the sticky header text or the date too. However this changes won't be
appear either on the navigation bar (if you use it)
or the sidebar.
The placed stickies would overlap each other, but always the last
created will be atop. Please move it to an other place if you can not
properly read the text. Be careful when editing it because of the
on-built Move/Resize box appearing, and much rather delete a sticky if
you are not sure you do not moved or resized it by that unfortunately.
Use the sticky own resizer which will appear at the right corner of the
sticky. You can collapse a sticky either clicked in editor mode or
when it is disabled on the icon appearing at sticky header
beginning.
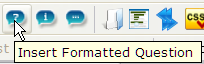
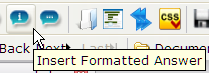 Click on either Question or Answer button
on the toolbar. Before clicking it you must place the cursor where to
you wish inserting it. You can not move these division. However you can
rich text edit their contents.
Click on either Question or Answer button
on the toolbar. Before clicking it you must place the cursor where to
you wish inserting it. You can not move these division. However you can
rich text edit their contents.
(* See the samples at the beginning of this page - formatted editable question answer divisions)
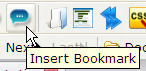 Click on either Bookmark button on the toolbar. Before clicking it
you must place the cursor where to you wish inserting it or select a portion of text which you wish to appear as
bookmark title. You may give an own bookmark title generated from
either selected a text-part or not, or you can leave the title empty.
In latter case only the bookmark icon will be inserted. The selection
and insertion rules are written above.
Click on either Bookmark button on the toolbar. Before clicking it
you must place the cursor where to you wish inserting it or select a portion of text which you wish to appear as
bookmark title. You may give an own bookmark title generated from
either selected a text-part or not, or you can leave the title empty.
In latter case only the bookmark icon will be inserted. The selection
and insertion rules are written above.
(* See the samples at the beginning of this page - formatted bookmarks)
 This function is not same as when you
are inserting an Anchor/Bookmark. The main difference is in this case
you can only mark a point of document for reading reference which will
appear on the sidebar. But this command will not place either an anchor
tag surrounding the selection or insert an id which to you can
later refer to in a link. You can link back here only from the sidebar.
This function is not same as when you
are inserting an Anchor/Bookmark. The main difference is in this case
you can only mark a point of document for reading reference which will
appear on the sidebar. But this command will not place either an anchor
tag surrounding the selection or insert an id which to you can
later refer to in a link. You can link back here only from the sidebar.
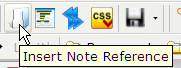
You will be asked to give the reference link until you had made a successful selection.
How to insert valid reference links see later in the WYSWYG Editing
- Insert Link section.
Choosing one from this part of the toolbar you can insert document improving tools, and you can save the document severally.
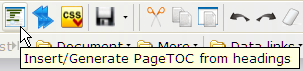
Click on Generate PageTOC button on
the toolbar. Before clicking it
you need not place the cursor anywhere!
The Page Content will be automatically placed at a given point of the document.
If you have structured your documents by headings which is otherwise
a useful guide and also for improving your site from the point of view
of present guidelines of SEO,
you can generate Page Table of Contents from those headings, by this
button. It is suggested to generating the TOC when you have already
finalized the document structuring, i.e. probably you aren't about to
insert new heading elements. However even if you generated a TOC, but
you will insert new headings you can generate it again, but you must
delete the previous one before. You can delete the TOC clicking on the  icon. You
can collapse/expand i.e hide/show the entire Page Content once
generated. You can also collapse/expand the heading which contains
further heading elements under themselves. A icon will appear next to the heading text in the TOC marking the section may be collapsed, and if it is yet collapsed a icon denotes the section may be expanded.
icon. You
can collapse/expand i.e hide/show the entire Page Content once
generated. You can also collapse/expand the heading which contains
further heading elements under themselves. A icon will appear next to the heading text in the TOC marking the section may be collapsed, and if it is yet collapsed a icon denotes the section may be expanded.
You can also choose to generate a document outline.
You will be asked doing it or not. The outlining means the content
under the heading tags in the main body of text will become collapsible and expandable. A icon will appear next to the heading text marking the section may be collapsed, and if it is yet collapsed a icon denotes the section may be expanded. Outlining would better improve the readability.
The only weak is here if you had once generated the outline you can not delete it in the present version of the editor. But,
it is not so confusing, due to it does not affect generating the TOC
more times. The newly inserted headings will became added to the
collapsible structure.
This function is not same as when you
open the sidebar and click on Switch to Heading list. The latter will
only list the heading structure you can navigate to that heading
element you have selected. But, the sidebar heading list will not
generate the Page Content.
When you generate a TOC there would be spaces
in the text of headings which from it is generated. All spaces will be
substituted automatically with '_' character in the reference links to
this headings also in the id of headings even if you see the spaces in
the main text or appearing in the TOC. It is important to know from that aspect when later
probably you wish to make a bookmark link to any of the
headings form the body of text.
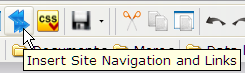 Click on Site Navigation and Links button on
the toolbar. Before clicking it
you need not place the cursor anywhere!
Click on Site Navigation and Links button on
the toolbar. Before clicking it
you need not place the cursor anywhere!
You can place only or place and write into the document site Global navigation, and Back/Next navigation elements which will be mapped to LINK tags.(i.e. LINK rel="start, next, prev, content, chapter, section, subsection, index, glossary, author, copyright, help, alternate...)
This
capability is fully corresponding to and usable together with the Site navigation bar 1.1.3 extension: https://addons.mozilla.org/hu/firefox/addon/1949

You must install this extension too, if you wish to use it.
The chosen navigation elements will be automatically mapped corresponding to the below given table
You can navigate too, clicking on the Navigation toolbar to the
corresponding point of elements in the document by this extension help.
(* Click on the below table links you can see
the pictures how certain elements will be mapped to and cooperating
with
the Site navigation toolbar, if it had been already installed)
| Selectable | Navigation elements | Mapping to Site Navigation Toolbar menu | LINK attribute |
|---|---|---|---|
| Home page | on the Global navigation top/bottom | as Start | start |
| Site Map | on the Global navigation top/bottom | as Document - Table of Contents (* it regards to the whole site content) | content,ToC |
| Index | on the Global navigation top/bottom | as Document - Index | index |
| Glossary | on the Global navigation top/bottom | as Document - Glossary | glossary |
| Search | on the Global navigation top/bottom | as More - Search | search |
| Download | on the Global navigation top/bottom | as Last | last |
| Support | on the Global navigation top/bottom | as More - Help | help |
| Author | on the Global navigation top/bottom | as More - Author(s) | author |
| Copyright | on the Global navigation top/bottom | as More - Copyright | copyright |
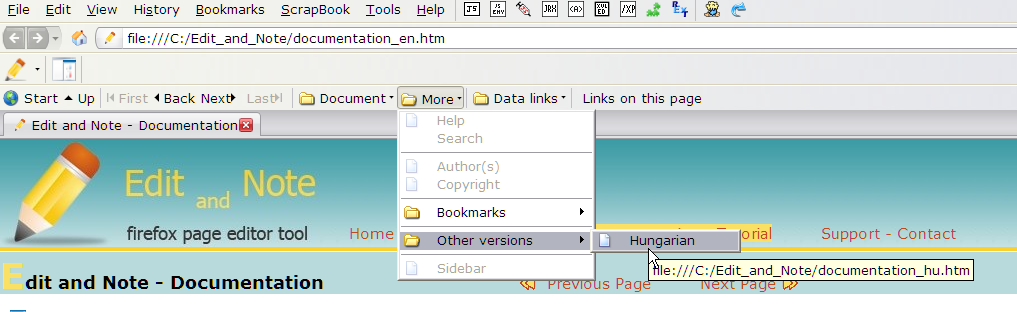
| on the Global navigation top/bottom | as More - Other versions | alternate | |
| Language | on the Global navigation top/bottom | as More - Other versions | alternate |
| Custom | on the Global navigation top/bottom | will not be mapped | |
| Up to(one level) | will appear only when there is no previous page | as Up | up |
| Up to(TOC) | will appear only at the bottom navigation | ||
| Previous Page | on the Back/Next navigation top/bottom | as Back | prev |
| Previous Page(non) | on the Back/Next navigation top/bottom | ||
| Next Page | on the Back/Next navigation top/bottom | as Next | next |
| Next Page(non) | on the Back/Next navigation top/bottom | ||
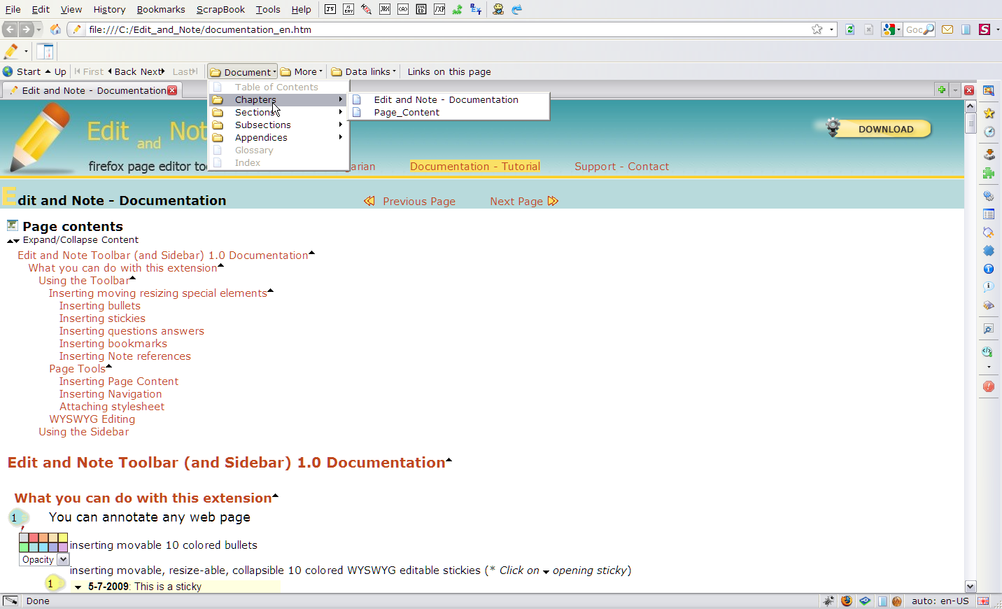
| Page Title and Page Content | as Document - Chapters (* it regards only to the given Page content) | chapter | |
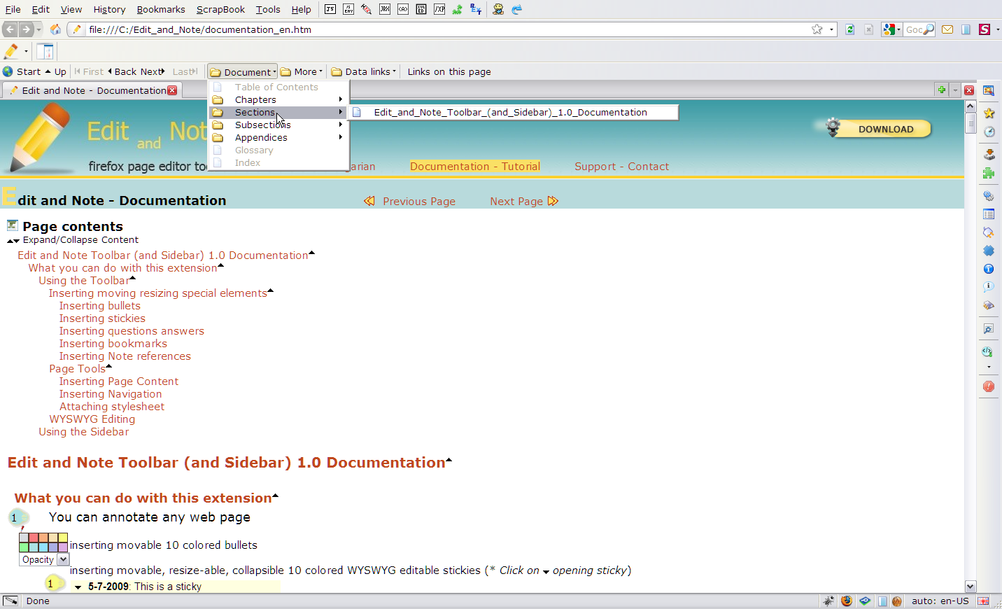
| Heading 1 elements | as Document - Sections | section | |
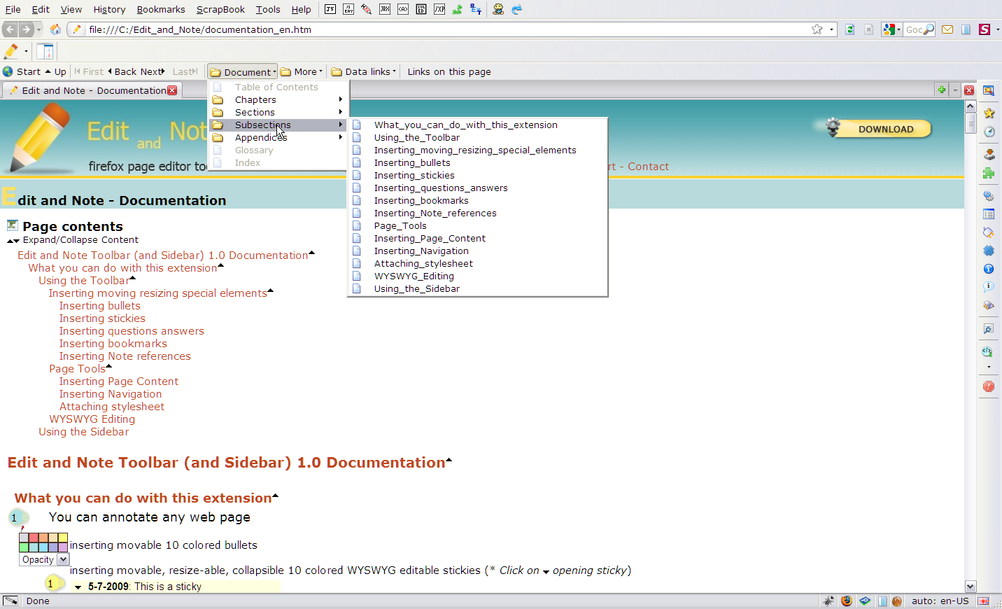
| Heading 2-6 elements | as Document - Subsections | subsection | |
| Note references | as Document - Appendices | appendices | |
| Bookmarks/Bullets/Stickies/Questions/Answers | as More - Bookmarks | bookmark | |
| stylesheets | as Data links - Stylesheets | alternate |
(*
In the above list the highlighted ones mark those navigation elements
which occur in this document, there is not any else meaning of
emphasizing)
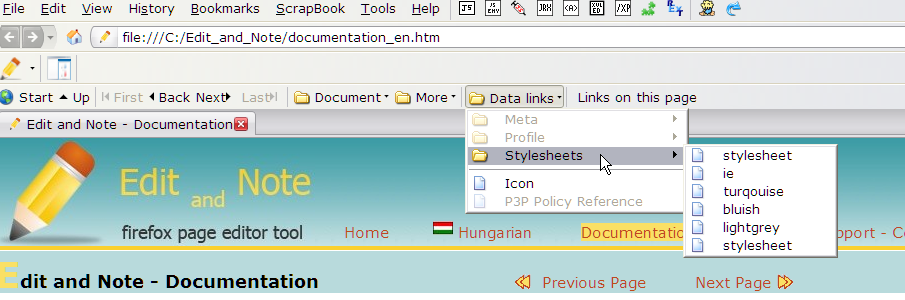
Please listen if you click
on a stylesheet on the (present version) Site Navigation Toolbar Data
links - Stylesheets menu, it will not change the styles rather it will
load the
stylesheet into the focused tab. Because of this is not the feature
of Edit end Note Toolbar you will not be warned about it! If you wish using the alternate stylesheets
change them by the browser View-Page Style menu point or JavaScript
driven.
Site Navigation and Links button: When you clicked on it you will be asked selecting a Navigation Type
Navigation Types: You can choose one of six selectable possibilities at at time. However you can select repeatedly one from 3-6 if you wish inserting each of them.
If you have already inserted any of them and try to insert
same type again, or you have already inserted one and then you choose Fill only
you will be informed.
After you had chosen which Navigation type you wish inserting you can select its individual elements one by one. You would select the Navigation types only from the above listed ones. Also any of their individual elements may be selected from a predefined element list.
1., 2. Fill ..Navigation only: If you had chosen either of them the further selected navigation elements will only mapped to the LINK tag with their appropriate rel attribute, but will not be inserted into the document. Even if they will appear on the Site navigation toolbar.
3., 4. Global navigations at top and bottom may
contain different elements. It will be inserted automatically at a given point of the document.
Navigation Type Elements:
In the following select box you can choose from repeatedly but one at a time of them
You need follow that order what the list suggests due to they will be
written in that order even if you don't choose in that sequence.
1-10 The titles are
determinate and may be selected once. Those icon pictures which may
appear in front of them must be written in your custom stylesheet.
(* See the downloadable sample stylesheet - on the home page - Downloads)
11., 12. Language and Custom items would be selected more times.
If you had chosen Language element
you can either select using a predefined flag by stylesheet or can
select a custom title for the language and you can insert any language
flag picture from the local file system. In the first case the title
must be same as you predefined in the stylesheet apart from
case-sensitivity. In the second case the title may be given by you and
also the picture may be inserted or not.
If you had chosen Custom element the title may be given by you and also the icon-picture may be inserted or not from your file system.
5., 6. Back/Next navigation at top and bottom will be inserted automatically at a given point of the document.
Navigation Type Elements:
In the following select box you can choose from repeatedly but, one at a time of them
Up to(one level) Will not appear in the select list but will
be automatically displayed either on top or bottom or both if you
selected Previous page(non)
Up to(TOC) Will not appear in the select list but will be automatically displayed only at bottom always.
Either you have selected Global or
Back/Next navigation elements in each case you have to give a
navigation link. Until you haven't given
a valid URL you can not continue your work. How to insert valid
reference link see later in the WYSWYG Editing -
Insert Link section.
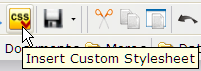
Click on Custom Stylesheet button on
the toolbar. You will be asked to choose a .css file from your file system via a File Picker.
Select a file from the File Picker. You
will be also warned to copy the dependent pictures involved in your
custom stylesheet to the appropriate place, because this editor will
not be able to copy them.
If you are planning to use a custom stylesheet, I suggest to download the offered one, (this page style sty_turquoise.css from home page - Downloads), for example to see and compare which are the parts of it which corresponds to or alterable based on the base sty_bullet_sticky.css and sty_bullet_sticky_ie.css.
The latter ones always will be attached to your edited page if the
documents haven't contained yet when you switch on to any of editor
modes at first. The
base stylesheets contain all pictures and settings which necessary
for displaying the stickies, bullets, formated question answer
divisions, bookmarks, headings and navigation. The default stylesheet
for using the document in Firefox is the sty_bullet_sticky.css, the other one will only used when you open the document in IE.
Please DO NOT MODIFY THE BASE
STYLES! Both these two base styles, and also the necessary pictures
will be automatically saved when you saving an edited document at first.
Owing to the cascading stylesheet rules always the last style rule
applied on an element will be the most valid. Thus, the linked,
attached stylesheets order very important! It means, if you use a same
style rule in your attached stylesheet as it is in the base too, but
you little alter that and attach your stylesheet which follows the
base in their linked order, always your style rule will be the actually
applied. Listen to it, and be careful!
You can attach more custom stylesheets, but listen to that always the last attached will be the first following the base ones! You also can not delete by this editor the already attached stylesheets! Use any of html editors or suggested extensions for example Firebug to delete an element in its HTML view panel.

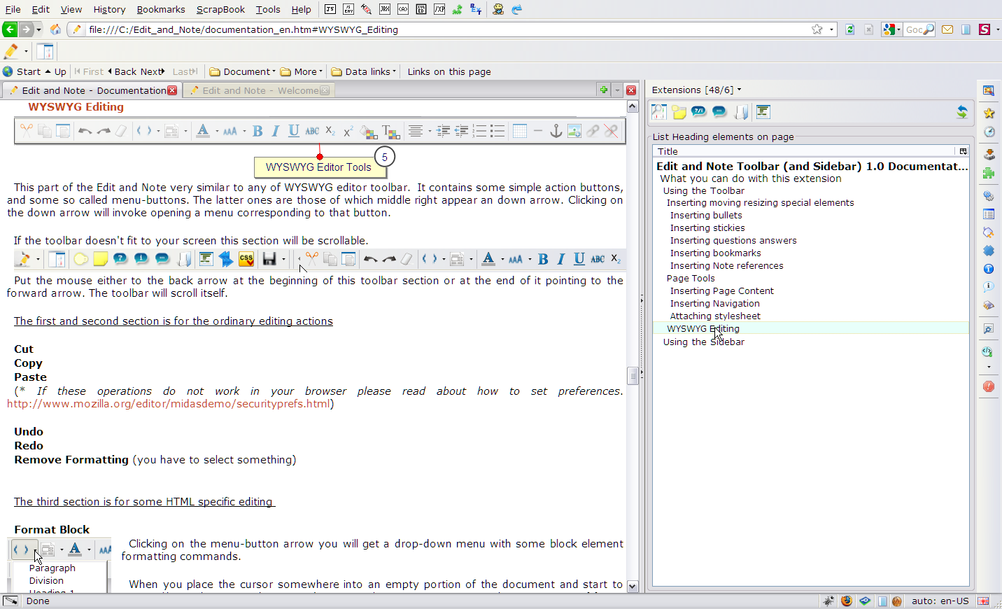
This part of the Edit and Note very similar to any of WYSWYG editor toolbar. It contains some simple action buttons, and some so called menu-buttons. The latter ones are those of which middle right appear an down arrow. Clicking on the down arrow will invoke opening a menu corresponding to that button.
If the toolbar doesn't fit to your screen this section will be scrollable.

Put the mouse either to the back arrow at the beginning of this
toolbar section or at the end of it pointing to the forward arrow. The
toolbar will scroll itself.
The first and second section is for the ordinary editing actions
Cut
Copy
Paste
(* If these operations do not work in your browser please read about how to set preferences. http://www.mozilla.org/editor/midasdemo/securityprefs.html)
Undo
Redo
Remove Formatting (you have to select something)
The third section is for some HTML specific editing
Format Block
Clicking on the menu-button arrow you will get a drop-down menu with some block element formatting commands.
When you place the cursor somewhere into an empty portion of the document and start to type unlike in the MSWord you won't necessarily write into a paragraph. To assure writing a paragraph you must select this block formatting command. You can control what type of writing by using also Firebug. Open Firebug and click its Element Inspect button. You can also observe the difference if you use a stylesheet which determines a paragraph formatting.
If you want to insert a division block element choose this command.
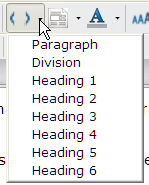
You can create headings formating choosing
from 1-6 Heading block. Place the cursor somewhere in the text you wish
to make a heading and select one of heading levels from the list. The
heading levels will appear at first by their default styling, if you
are not using a custom stylesheet defining them.
Insert element Attributes
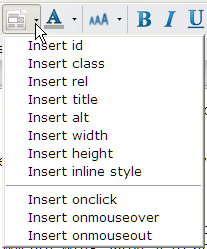
Clicking on the menu-button arrow you will get a drop-down menu with some element attribute commands. This attribute list contains only the most important and frequently used ones.
First you must place the cursor where to
you wish inserting any of them. Generally when you place the cursor
somewhere in the written text, it will be determined whether what is
the nearest element (parent) involving the text. It would be a
paragraph, division, td or anchor. You can select immediately an
element too, but you will be informed which element had been actually selected exactly.
You can respond then whether you wish to add an attribute for that
element, or you can choose Cancel the operation. If there is such
parent element of the selected one which to you may insert the selected attribute you will be asked again.
( For
example it would be for creating a class or rel attribute for an anchor
element which involves an IMG tag. At first you will get selected the
IMG, but when cancel the operation it will be offered its parent tag A.
Same will happen if you choose a TD element, but you wish insert an id,
width, height, class or inline style attribute for the TABLE element
rather.)
If you finally Cancel will not happen anything. If you choose OK inserting you must give the attribute value.
At the moment there is not any on-built help which kind of inline
styles would be inserted you need to be a little familiar with it. If
you write a wrong one there won't be inserted anything. You can delete
an attribute on that tag for which something was inserted previously.
Select that element again and give again same attribute with an empty
value. You can control every such kind of operation by the help of Firebug.
You can also use CodeBurner for Firebug as a help at your fingertip. http://tools.sitepoint.com/codeburner/
Please listen to giving the id names space substituted for example with '_'. And it is also suggested for class names.
The fourth section contains the classical text or character formatting possibilities
Font name
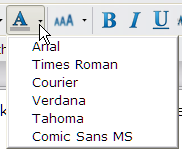 Clicking on the menu-button arrow you will get a drop-down menu offering some Font names.
At the moment you can choose only from those most frequently used six ones.
Font Size
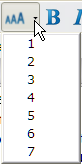
Clicking on the menu-button arrow you will get a drop-down menu offering the available maximum Font size settings.
If you have altered the browser minimum
font size setting in the Tools menu Settings Font and Colors Advanced
tab, or you are using NoSquint extension, the font size setting may not
work! At least you won't see working. This means the size will be
correctly set, but it won't be displayed well.
Bold
Underlined
Italic
Strikethrough
Subscript
Superscript
Background color
Text Color
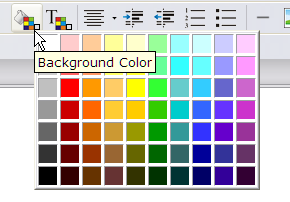
Clicking on either the background or text color selector you may
choose from the color selection grid. At both buttons lower right
corner there is minuscule square which will show the last color
setting. You may remove the color formatting using the Remove Formatting button.
Any of the above commands requires something to be selected!
The next section is for paragraph formatting
Align paragraph
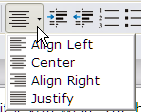
Clicking on the menu-button arrow you will get a drop-down menu.
Put the cursor somewhere into that paragraph you wish align and choose one of the align possibilities.
Indent
Outdent
Ordered (Numbered list)
Unordered (Bulleted list)
You need to use a style sheet to change the base appearance of a
bulleted list. You can not use also a composite list and run-on
numbering, at the basic setting.
The sixth section is also for HTML special elements inserting
Insert Table
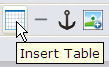 You can insert and format (by the help of Insert element Attributes) simple tables.
You can not make complicate cell
combining and separating operations. Also you can not do highlighting
whole rows and columns and can not delete a row and column individually
by this editor version. You can experiment with the deletion if you are using the Firefox on-built table editor mode. It is a little tricky and
risky! Let you try it at first on an empty table! You can not undo table inserting either!
When you click on this button you will get an Insert Table dialog
window. This may look very similar to someone who ever used Dreamweaver.
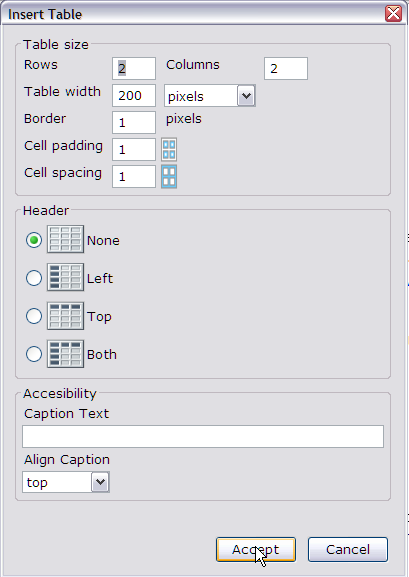
Choose the rows and columns number at first.
Then you give the whole table width by pixel or %.
(Later you can adjust the columns individually with the help of Insert element Attributes button. )
You can determine whether there be Border around the cells and how
many pixel space between them, and how much be the padding in pixels.
You can specify whether there are headers and where to be placed if there are
| header1 | header2 |
|---|---|
| header2 | write here |
You can also specify here whether there be caption text and where (top, bottom, left right)
| write here | write here |
| write here | write here |
You can Accept or Cancel the the table inserting.
After you had made the simple table inserting you can style the
table, and write into the cells where are the denoted texts. Click into
the cells which to you wish giving a style and set a width, or an inline
style by Insert element Attribute menu. You can format the whole table and rich text edit the written content, too.
| my header text | my header: The whole table width 100% |
|---|---|
| width 10% set | width 90% set |
Insert Horizontal Line You
can insert a separator line. You can also style it by the stylesheet.
If you wish giving a color to the line do it simply selecting the line
and choosing a color from the text color picker. Unfortunately you can
not resize or move the line by the FF on-built resizer. You can delete
it by selecting and pressing delete button on the keyboard. (* Sometimes
the selection is not successful, at least you won't see the selection anchors
thus try again and again until you see the color appearing as you have selected from
the color picker)
Insert Anchor Bookmark
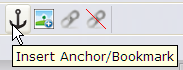 Similarly as when
inserting a formatted bookmark or Note reference you can select a
portion of text and you can make an anchor surrounding the selected
text. Please listen to the selection rules! The selected text will be
the default anchor name. You may change the preselected anchor name, but if you had altered the selected one, the selected text will be replaced with your choosen one. If nothing was selected won't happen anything! But, you won't get any message about it.
Similarly as when
inserting a formatted bookmark or Note reference you can select a
portion of text and you can make an anchor surrounding the selected
text. Please listen to the selection rules! The selected text will be
the default anchor name. You may change the preselected anchor name, but if you had altered the selected one, the selected text will be replaced with your choosen one. If nothing was selected won't happen anything! But, you won't get any message about it.
The spaces in the given anchor name will be automatically substituted with '_' character.
This command is not same as when inserting a
formatted bookmark. The most important difference is you can make a
bookmark link here anywhere from inside the document (e.g #anchor_name)
or outside referring to in the URL of document. (e.g.
file:///C:/documentname.htm#anchor_name,
http://domain/document.htm#anchor_name)
Insert Image
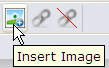 You can insert a picture either from your file system or form any outer link (URL).
You will be prompted to give the image URL or if you Cancel this prompt you will get a File Picker choosing an image file from your local file system.
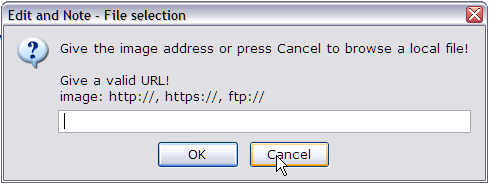
If you don't choose anything you will get a message there was not anything selected, and nothing will be inserted.
Please DO NOT CHOOSE AN
IMAGE FROM A DIRECTORY WHICH HAS NON-STANDARD CHARACTERS! The spaces
in the directory name is not so problem, but I suggest using such
directories which are named without non-standard characters and at least the spaces substituted with '_' for example.
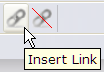
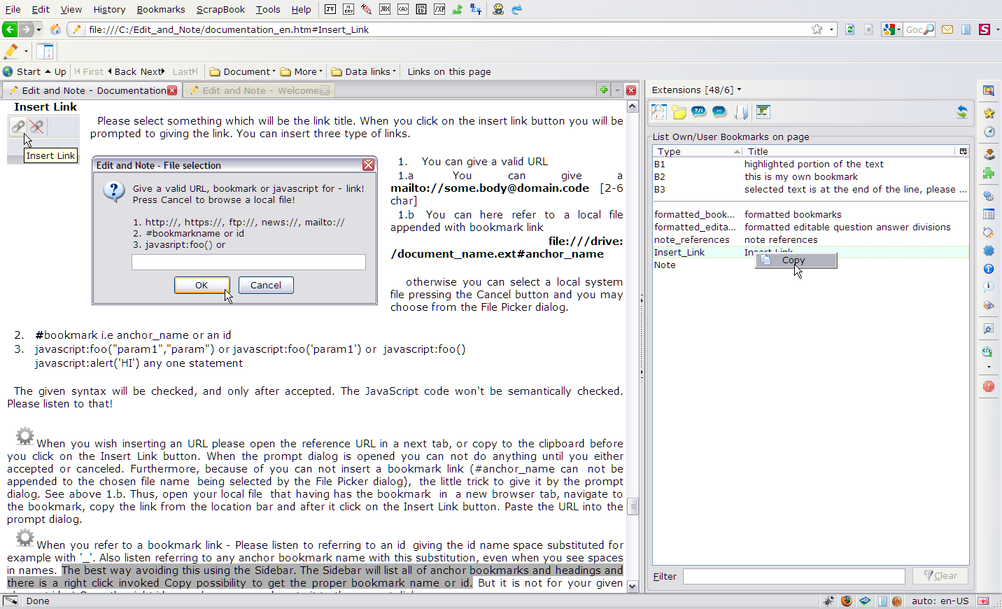
Please select something which will be the link title. When you click
on the insert link button you will be prompted to giving the link. You
can insert three type of links.
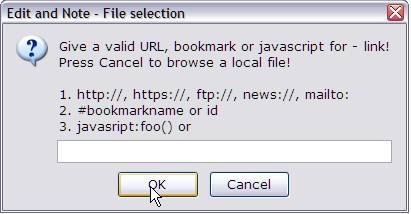
1. You can give a valid URL
1.a You can give a mailto://some.body@domain.code [2-6 char]
1.b You can here refer to a local file appended with a bookmark link
file:///drive:/document_name.ext#anchor_name
otherwise you can select a local system file pressing the Cancel button and you may choose from the File Picker dialog.
2. #bookmark i.e anchor_name or an id
3. javascript:foo("param1","param") or javascript:foo('param1') or javascript:foo()
javascript:alert('HI') any one statement
The given syntax will be checked, and only after accepted. The JavaScript code won't be only raw format checked syntactically not inspected! Please listen to that!
When the Insert Link prompt dialog is opened you
can not do anything until you either accepted or canceled. Thus, when you wish inserting an URL please open
the reference URL in a next tab, or copy to the clipboard before you
click on the Insert Link button. Furthermore,
because of you can not insert a bookmark link (#anchor_name can not be
appended to the chosen file name being selected by the File Picker
dialog), the little trick to give it by the prompt dialog. See above
1.b. Thus, open your local file that having has the bookmark in a
new browser tab, navigate to the bookmark, copy the link from the
location bar and after it
click on the Insert Link button. Paste the URL into the prompt dialog.
When you refer to a bookmark link - Please
listen to referring to an id by giving
the id name space substituted for example with '_'. Also listen
referring to any anchor bookmark name with this substitution, even when
you see spaces in names. The best way avoiding this using the Sidebar.
The Sidebar will list all of anchor bookmarks and headings and there is
a right click invoked Copy possibility to get the proper bookmark name
or id. But it is not for your given element id-s! Copy the right id or
anchor name and paste it to the prompt dialog. (* See below in the Sidebar section)
Do not forget you may insert links into the stickies too!
You can refer anywhere in the text and also in the stickies to the inner elements by their id-s. ( n represents their number)
| bullets | #Xn |
| stickies | #Sn |
| formatted bookmarks | #Bn |
| questions | #Qn |
| answers | #An |
| note references | #Nn |
Remove Link
If you wish to remove a previously inserted link select the link then press this button. It will remove the link. 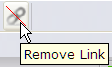
The other powerful capability of the Edit and Note is its Sidebar.
The Toggle Sidebar button will open or close the Sidebar depending on whether it is already opened or not.
You can open the Edit and Note Sidebar from the Browser View Sidebar
menu, or list of the opened
sidebars .
The Sidebar
can be used not only for those pages which you are currently editing.
But, it is capable for listing headings and user anchor bookmarks
already placed into any document.
When you first open the Edit and Note
Sidebar it is advised refreshing the actual window getting the proper
data! This is because of there would be such case when you switch
between tabs meanwhile the sidebar is open. Thus when tab switching
occurs the Sidebar data won't be automatically refreshed. You need to
do it by yourself whether which tab actual data you wish getting.
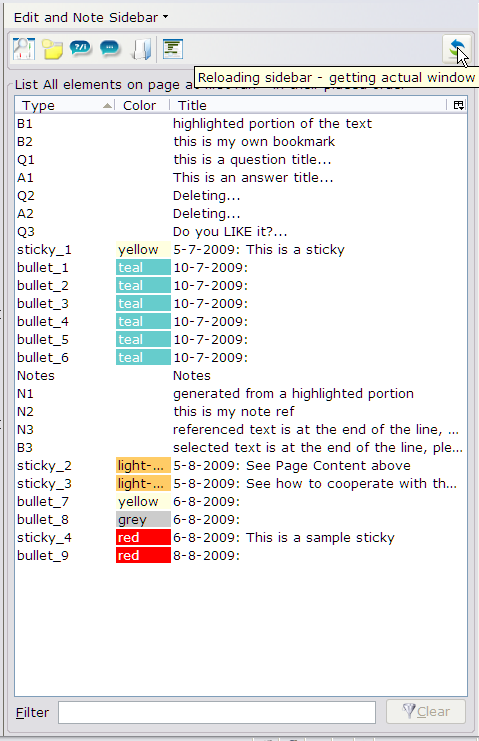

Sidebar main toolbar. There are six panes, views in the sidebar which you can control by the buttons. Depending on the chosen panes the view title and columns title will vary.
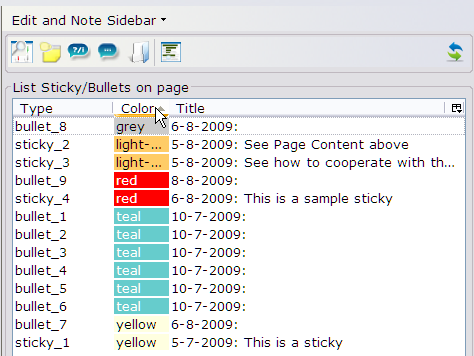
Almost in all views you can sort the elements ascending, descending clicking on the columns title, and also you can filter the elements at the sidebar bottom.
Changing the panes: (clicking on pictures enlarges its view)
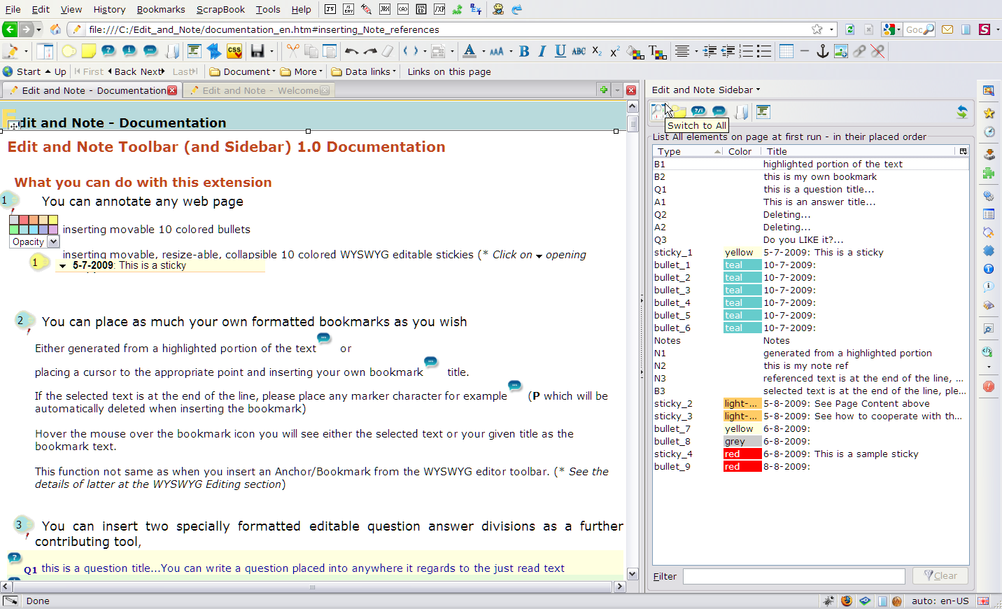
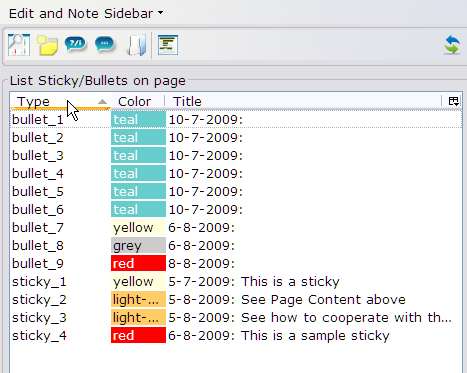
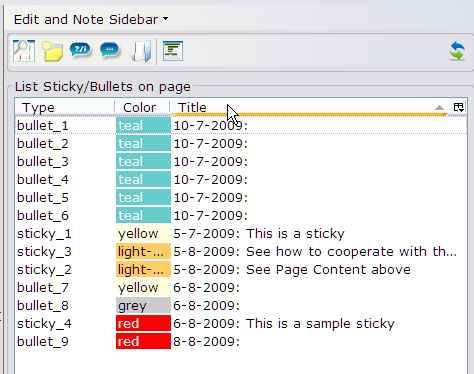
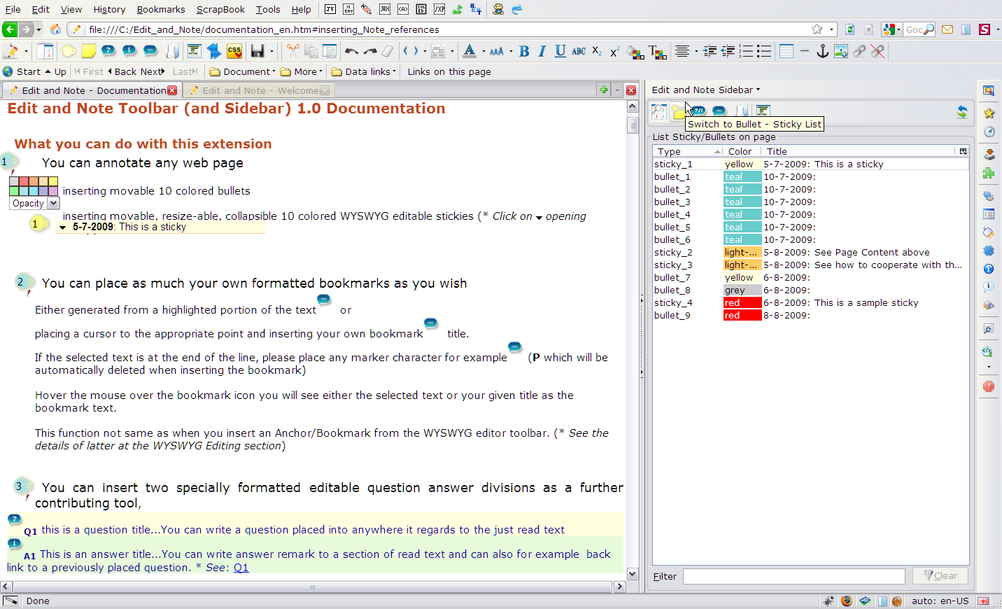 Switch to Bullet - Sticky List button will list all placed bullets and stickies in their first order. You can sort and filter them
(click the link to enlarge)
 Switch to Question - Answer List button will list all placed questions answers in their first order.
You can sort and filter them too.
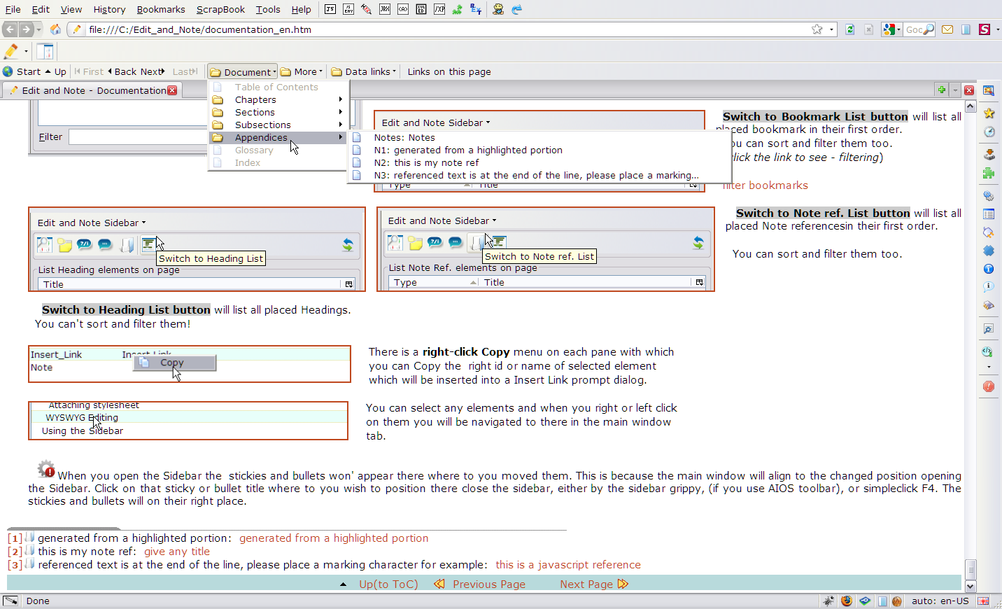
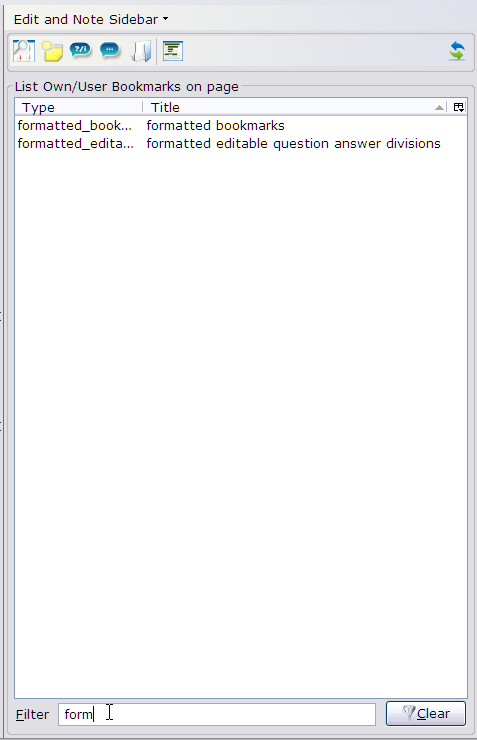
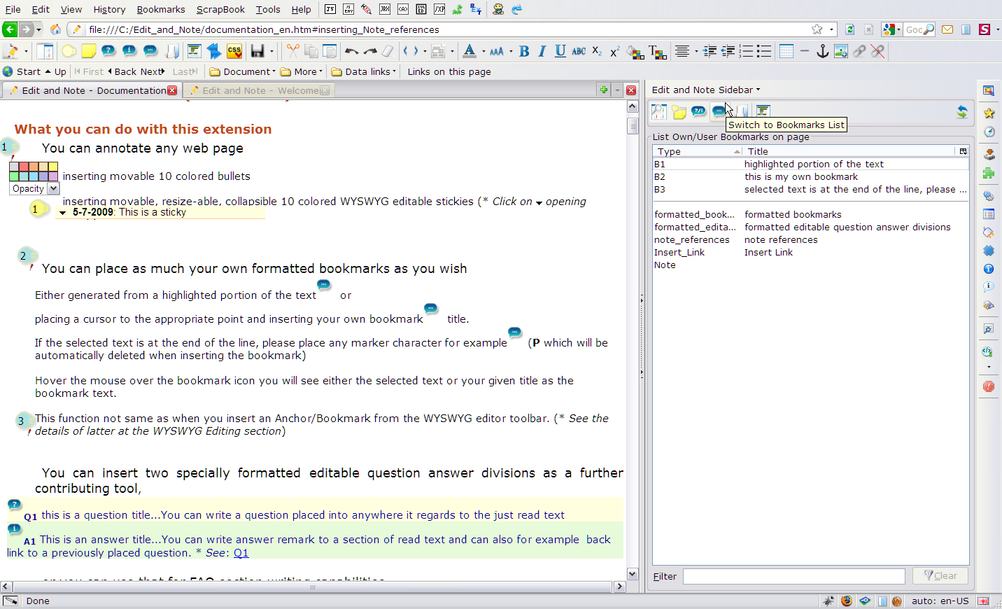 Switch to Bookmark List button will list all placed bookmark in their first order.
You can sort and filter them too.
(click the link to see - filtering)

Switch to Note ref. List button will list all placed Note references in their first order.
You can sort and filter them too.
Switch to Heading List button will list all placed Headings.
You can't sort and filter them!
 There is a right-click Copy menu on each pane with which
you can Copy the right id or name of selected element
which will be inserted into a Insert Link prompt dialog.
You can select any elements and when you right or left click
on them you will be navigated to there in the main window
tab.
When you open the Sidebar the stickies
and bullets won't appear exactly where to you moved them. This is
because
the main window will align to the changed position opening the Sidebar.
Click on that sticky or bullet title where to you wish positioning to,
then close the sidebar either with the sidebar grippy, (if you use AIOS
toolbar) or simple click F4. The stickies and bullets will be on their
right place. Similarly it will happen, when you insert or collapse the
Page Content. Place the bullets after you had inserted the finalized
TOC, or when collapsed expand again, every bullets and sticky will its
right place. (It would be a little confusing, but may require a big work repeatedly
recalculate the positions of every bullet and sticky placed after such
collapse/expand event occur or someone open close the sidebar?)
IMPORTANT NOTE:
If you have already installed the Edit and Note toolbar you can
experiment with it on this page,
too! You can save this page also, but only locally. There is not any
restriction to append or modifying anything into it! It is peculiarly
useful for those ones who wish to develop toward this extension! Or
simply for those ones who wish reading it from their local drive
(off-line).Their is not any function forbidden so you can move, resize,
delete, any element even if you haven't yet got the toolbar. Until you
haven't installed the toolbar you will see scrolling the editor-lite
toolbar in the lower right corner of the window. If you switch the
editor mode, you can minimally (text) edit either
the whole document or sticky, question, answer sections. If you deleted
something important, it have happened what you can not rebuild, simply
RELOAD the page!
 referenced text is at the end of the line, please place a marking character for example: this is a javascript reference


